Usually use 4 AWG wire or bigger for this project. I would recommend not using a wire smaller than the wire you have powering your amplifier. So if you are using a 2 AWG wire to power your amplifier the smallest wire you want to use for this upgrade is a 2 AWG.
1. Disconnect your cars battery to ensure you will not accidentally short something out in the process.
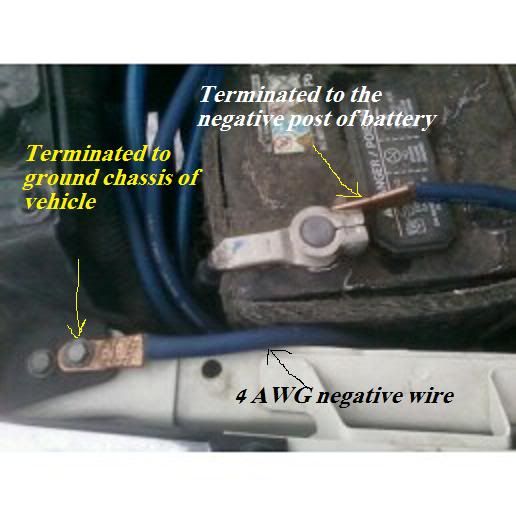
2. Measure the distance between the negative on the battery and a good grounding point on the vehicle, cut the wire with a little extra slack in it in case you need it. Shorter you make the wires the better. Now install ring terminals on both sides of the wire. Connect one side of the wire to the vehicles chassis if it is a painted surface make sure you sand off the paint to make sure you get a good connection. Then connect the other side of the wire to you negative post terminal on your battery. This connection will ensure the car is grounded to the fullest so then the amplifier can use that ground to power itself better.
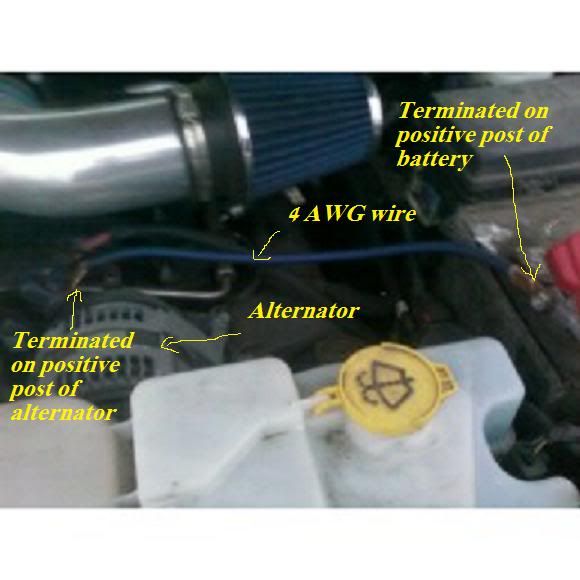
3. Some people use red wire for this step but red wire is not required. Red wire will just verify that it is a positive wire and does not get mixed up with a ground wire in the future. Now measure the distance between the alternators positive output to the batteries positive post terminal. Cut the wire with a little extra slack in it in case you need it. Remember shorter the wire the better. Install ring terminals on both sides of the wire. Connect this wire to the alternators positive out put terminal to the positive post on the vehicles battery. This connection will ensure your battery is being charged to its fullest. The stock wire some times is too small and can not handle the charging capability when put in stressful situations, like when the amplifier is pulling an excess of amount of power. Some people put a inline fuse on this wire to ensure this wire will never short out, this practice is a great idea but not required.
4. Now measure the distance between the engine ground strap where it terminates to the engine to a point on the vehicle chassis. A good ground point on the engine chassis is where the ground strap from the engine terminates to the vehicles chassis. Cut a wire to this distance and install ring terminals on both sides of the wire. Now attach the wire to the engine ground terminal and to the vehicles chassis. This connection will ensure a good ground from the engine to the chassis on your vehicle. This will make sure the alternator is grounded properly because the alternator is bolted to the engine which makes the alternator grounded to the engine. Some people cant find the ground strap on the engine itself it is possible for you to terminate the ground wire to any bolt on the engine i would advise that you use a bolt that does not have a huge part in keeping the engine together or a bolt that is not holding fluids in the engine some how.
5. Reconnect your vehicles battery like it was before you disconnected it and make sure you hook up the new wires you just upgraded to the battery also.
After doing all three of these upgrades you should see a significant change in how good your vehicles electrical system can handle your amplifier with out all the dimming lights and etc. If your amplifier is still robbing all the power out of your vehicles electrical system it may be time for you to upgrade to a higher output alternator, bigger deep cycle battery as in a optima battery.